G-QWFRWL7ZQ5

Quick Read: The Shrink Sleeve Process

October 4, 2018


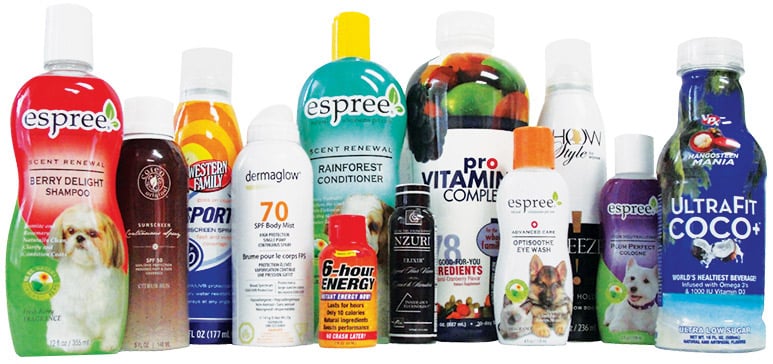
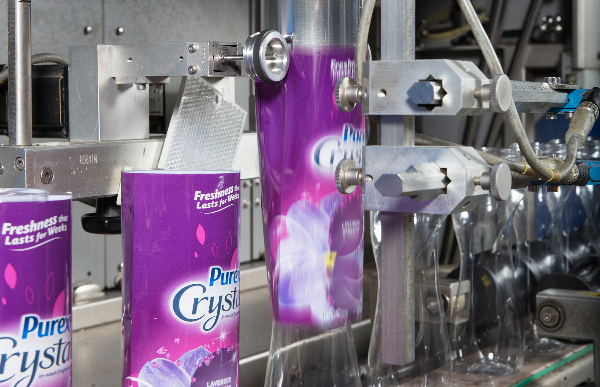
Have you ever wondered how the shrink sleeve process works? You know what it is, but have you ever actually seen it come to life? Throughout this blog post, our experts at Verst are going to walk you through this  process and explain how the shrink sleeve labeling process works, defects that can occur, and how to master compensation and distortion.

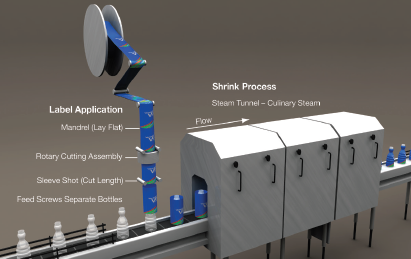
The typical shrink sleeve process at a glance:

Shrink Sleeve Process

  1. A tote full of containers is dumped into a hopper and fed through a sorting bowl.
  2. Containers are flipped and uprighted to the line at a very high speed.
  3. Plasma treating can be done for optimal adhesion between the container and sleeve.
  4. Flat sleeves on rolls are fed over a specifically sized mandrel and rotary cut with a blade.
  5. Film is advanced to the sleeve shot and applied over the container.
  6. Defect detection system rejects mislabeled containers and splices.
  7. Containers go into the steam tunnel.
  8. Sleeves are shrunk to the shape of the container.
  9. Quality inspectors compare containers to established visual standards – left, right and height label placement.
  10. Containers go through a dryer.
  11. Containers are packed to customer specification.

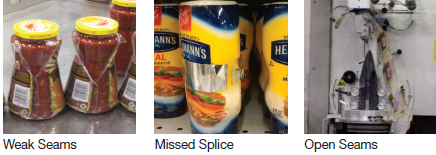
Common Shrink Sleeve Defects:

Making sure your labels are sized correctly will help you dramatically reduce sleeve defects. The most common flaws to look for include:

  • Print defects: Streaks, haze, missing print, color, misaligned print registration and UPC scanning issues
  • Open seams: Insufficient or no seaming solvent, causing sleeve to open during application
  • Weak seams: Not enough seaming solvent to maintain seam integrity after shrink
  • Stuck seams: Seaming solvent has migrated inside sleeve, creating a tooling jam
  • Too-small lay flat: Sleeves jam on the applicator, caused by manufacturing defects or exposure to excessive heat during shipment or storage
  • Poorly made splices: Can cause tooling jams and downtime
  • Loose/telescopic rolls: Not enough tension can cause material handling issues during production

Shrink Sleeve Labels

Art Development: Mastering Shrink Compensation and Distortion

Keep in mind that shrink labels require a distortion or compensation of graphics. This is important because you want the logos and graphic elements to appear correct when they’re conformed
to the container shape.

  • When designing, be sure to take your container shape into consideration.
  • Use a printed grid pattern if possible. This tool provides data on how the sleeve is forming to the container – showing patterns of distortion areas to avoid, or where to leave room when compensating for graphics.

Above is the typical shrink sleeve process at a glance, have you found your decorator yet, or do you know how to arrive at your size and shrink percentage? Check out our two blog posts here:

Read Here: Selecting the Right Shrink Sleeve Decorator

-or-

Read Here: 5 Steps to a Successful Shrink Sleeve Application

Tags:

Packaging , Shrink Sleeve Labeling

Keep Reading

Packaging

white
August 31, 2018

5 Strategies to Solve Demand Planning Problems

In order for companies to improve how they respond to and manage demand, these companies must ensure that their forecasting, demand sensing and shaping, planning, and fulfillment capabilities are...

Packaging

white
July 26, 2018

7 Inspections to Ensure a Safe Work Environment

Formal and informal safety inspections are a valuable tool to measure continuous improvement in the Safe Operations Program. Informal inspections should be performed by all associates as a means of...

Packaging

Warehouse Safety Dos and Donts-1
October 1, 2018

Warehouse Safety: Do's and Dont's

Having an efficient warehouse means nothing if there is no safety protocol to go along with it. These measures are designed to protect both the employees working in the distribution center and the...

Contact Us

footerLogo

Get In Touch

300 Shorland Drive Walton, KY 41094-9328

Follow us on: