


September 26, 2018
Are you looking to contract your packaging to a 3PL provider who does shrink sleeve labeling? If so, we have designed the best ways to ensure you have a successful shrink sleeve experience.
First, decide on your application:
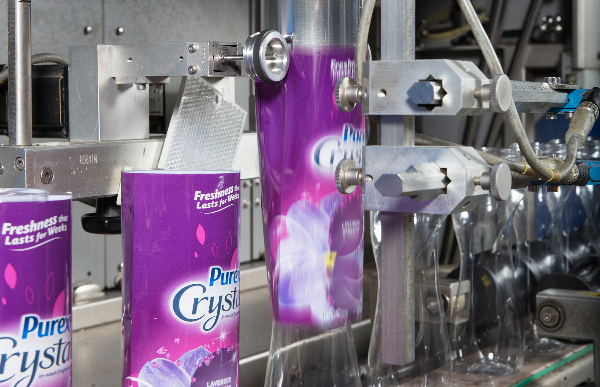
Start by determining whether your shrink labels should be hand applied or automatically applied with tooling. Use these criteria to make that very important decision:
1. Your volume, run size and number of SKUs
2. Container drawings and samples provided by the manufacturer
3. Availability of tooling and change parts
4. Your timing requirements and lead time
5. Your application line requirements – including steam tunnel
6. Other tooling requirements – such as descrambler, auto-orientation and case packer
Second, select your supplier:
As with your shrink sleeve decorator, a good working relationship with your shrink label supplier is a must. When selecting your supplier, make sure they:
• Have proven best practices and technical expertise
• Have demonstrated clear communication and collaborative skills – imperative for troubleshooting any issues that may arise.
Third, arrive at your shrink size and shrink percentage:
First, test for distortion and label placement on the container, then determine if an existing set of tooling is available for the containers. Next, follow these five steps to arrive at your label size and shrink percentage:
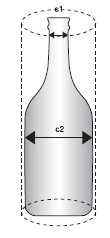
Step 1: Determine Shrink Percentage
• Using flexible tape, measure the smallest and largest circumference of the container. The difference between c2 and c1 is the required shrink percentage.
• To determine label lay flat (in millimeters): calculate the largest circumference(c2) divided by 2, and add 3mm for fit during application.
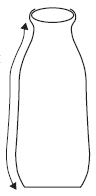
Step 2: Determine Cut Length (Repeat)
• Use a flexible ruler to measure along the container’s contour – measuring the distance from the bottom of the container (where you want the label to start) to the top (where you want it to end).
• Build in clear area (top and bottom) for the application equipment to read as an eye-mark for cutting purposes, as well as for a smooth shrink result.
• 4 mm clear (2 mm top and 2 mm bottom) is the industry standard.
Step 3: Determine Seam Location
Your shrink label supplier will recommend the optimal fold and seam location, based on previous production experience.
Step 4: Create a Preliminary Template
Your supplier will give the information gathered from Steps 1-3 to the sleeve maker, who will in turn create a template.
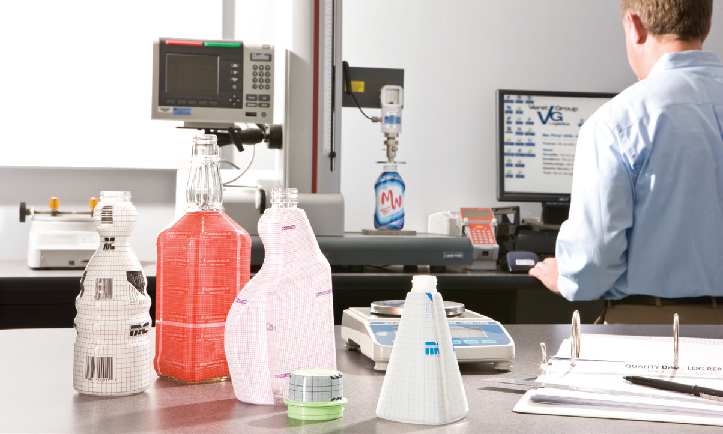
Step 5: Map Out Distortion
Your supplier should request grid film to run tests for distortion, so the label can be adjusted to eliminate distortion before it goes to print.
Tags:
Thinking about shrink for your next labeling project? The capital investment can be significant, so choosing the most qualified shrink sleeve decorator is imperative. Be sure to keep in mind these...
Have you already decided that shrink sleeve labeling is right for your product? If so, have you selected the right shrink partner? Should you go with automated or hand applied labeling? Find out your...
You could do your post-fill decorating in-house – undergoing a long learning curve and running the risk of decreased efficiency and increased scrap. Or you could reap the productivity and...
